Customising the NameSwitch node UI
Gaffer 0.55.0.0 introduces the NameSwitch node; like a Switch node, but using names instead of indices for switching between the inputs. This post shows an example of the NameSwitch in use, and describes how you might customise its UI to better suit your pipeline.
A typical use case
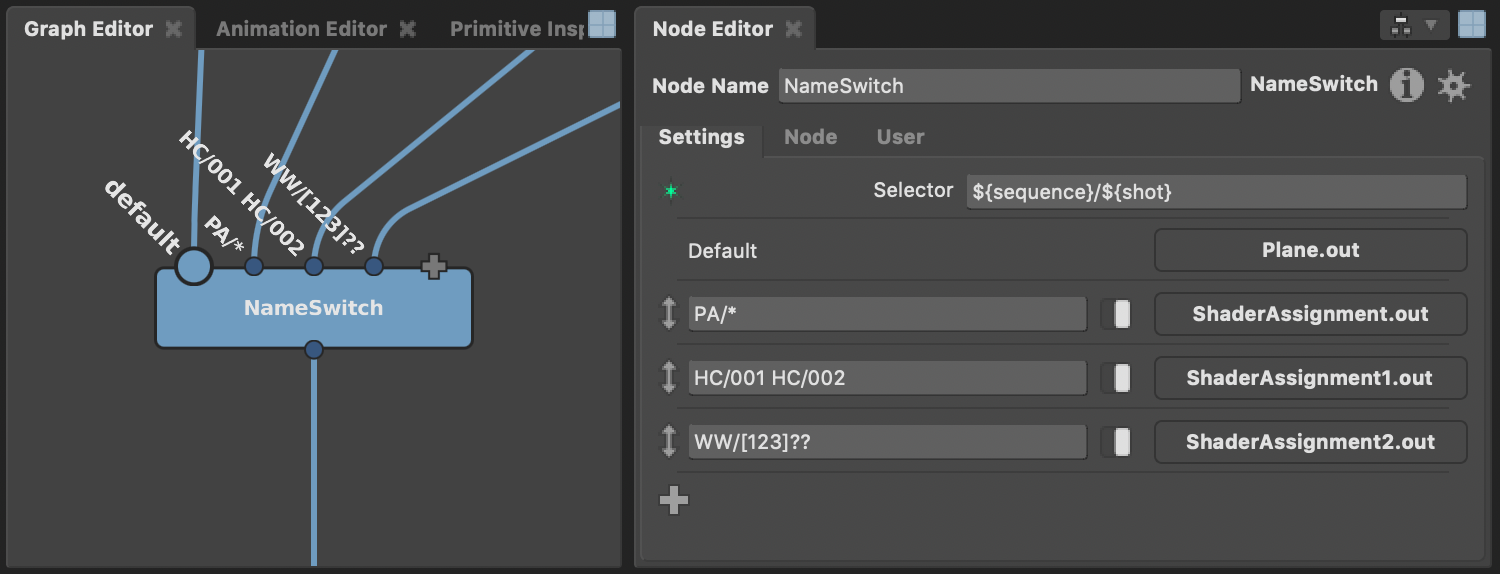
The most common anticipated use of this node is switching between branches for different shots in a multi-shot workflow, as illustrated by the fictitious graph below.

In this example, all shots in the PA sequence are processed by one branch, two specific shots from the HC sequence are processed by another, and a range of shots from the WW sequence are processed by the final branch. All other shots flow through the default input.
The value of the Selector plug is ${sequence}/${shot}, referring to two context variables that are used to manage the multi-shot workflow in this pipeline. Gaffer doesn't dictate your choice of variables; for episodic TV, perhaps ${episode} would be a useful addition, or for automated renders in a product catalogue perhaps you'd want to use ${productNumber} or ${brand}. This flexibility does have a downside, though: the UI for the Selector plug is not as friendly as it could be. You need to know what variables are available in your pipeline, and type them in with the correct syntax. It'd be great if we could tailor the UI to the pipeline's variables.
Adding a custom UI
Gaffer builds node UIs dynamically from registered metadata on the node and its plugs. Each node's standard UI metadata registers during startup, but you can tweak or override this UI using your own startup configs. Let's create our own startup config called NameSwitchUI.py, and place it in ~/gaffer/startup/gui. Then, let's give the NameSwitch node some default presets for its Selector plug, like so:
Gaffer.Metadata.registerValue( Gaffer.NameSwitch, "selector", "preset:Sequence", "${sequence}" )
Gaffer.Metadata.registerValue( Gaffer.NameSwitch, "selector", "preset:Sequence and Shot", "${sequence}/${shot}" )
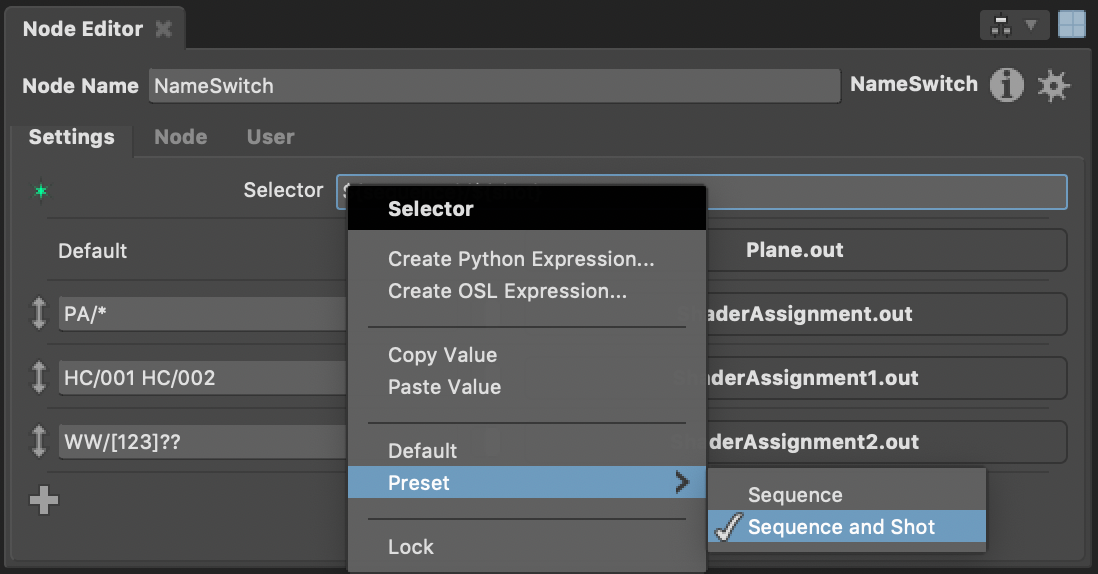
The next time we launch Gaffer, these presets will automatically be made available in the plug's context menu:

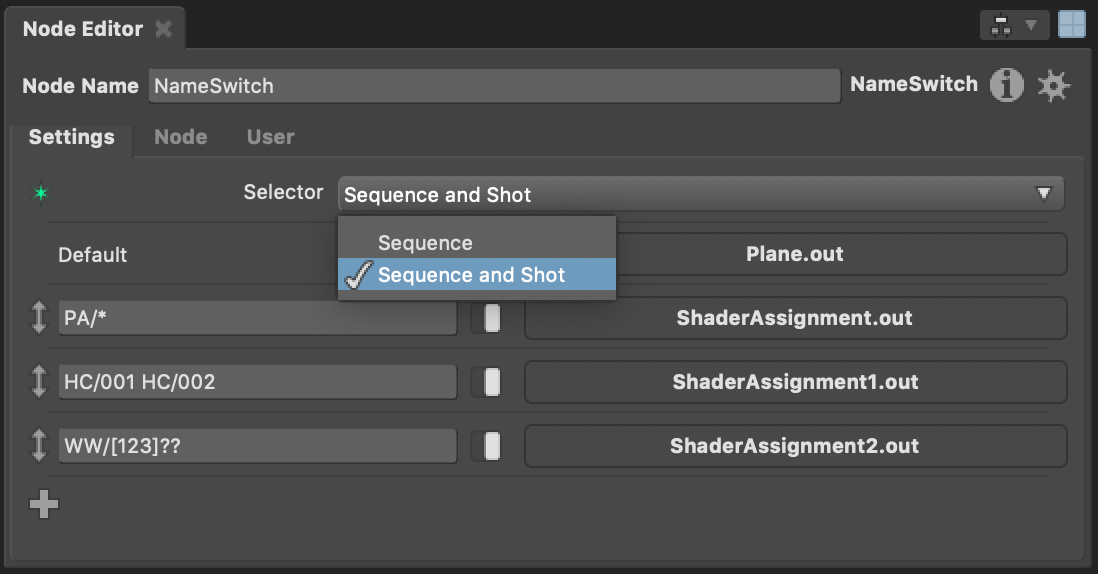
That's a worthwhile improvement, but it'd be nice if we could give these presets a little more prominence. We can do that by registering additional metadata to change the widget type of the Selector plug. In this case, a PresetsPlugValueWidget will give us a combo box containing the presets:
Gaffer.Metadata.registerValue( Gaffer.NameSwitch, "selector", "plugValueWidget:type", "GafferUI.PresetsPlugValueWidget" )
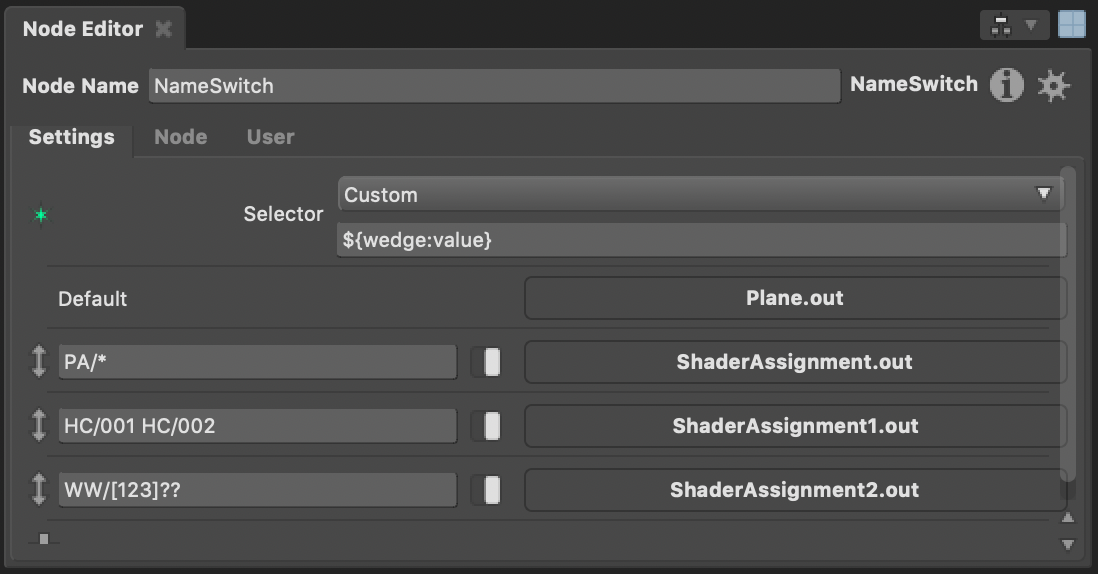
That's another worthwhile improvement, but what if the user wants to enter some text of their own, perhaps for a Wedge node context variable they've created? For that, we can register a further piece of metadata to include a custom section in the UI:
Gaffer.Metadata.registerValue( Gaffer.NameSwitch, "selector", "presetsPlugValueWidget:allowCustom", True )
Next steps
This ability to customise the UI using metadata isn't unique to the NameSwitch node: it applies to all nodes in Gaffer. For instance, you could customise the widget of the fileName plug on the ImageWriter node to link to your asset management system, or add presets to the fileName plug on the SceneReader node to bring in commonly used test assets.
Tom discussed some further details of UI metadata in a previous blog post, and Gaffer's reference documentation lists the metadata available to be customised. If you prefer to learn by example, then you may be interested to know that the UI Editor (available in the node context menu by right-clicking a node) is just a glorified metadata editor, and you can see the metadata that it creates by reading the saved .gfr script.
Happy Gaffering!