Attribute history
Today's tip will be a bit longer than usual. We'll be taking a dive into a very powerful built-in feature of Gaffer: the attribute history.
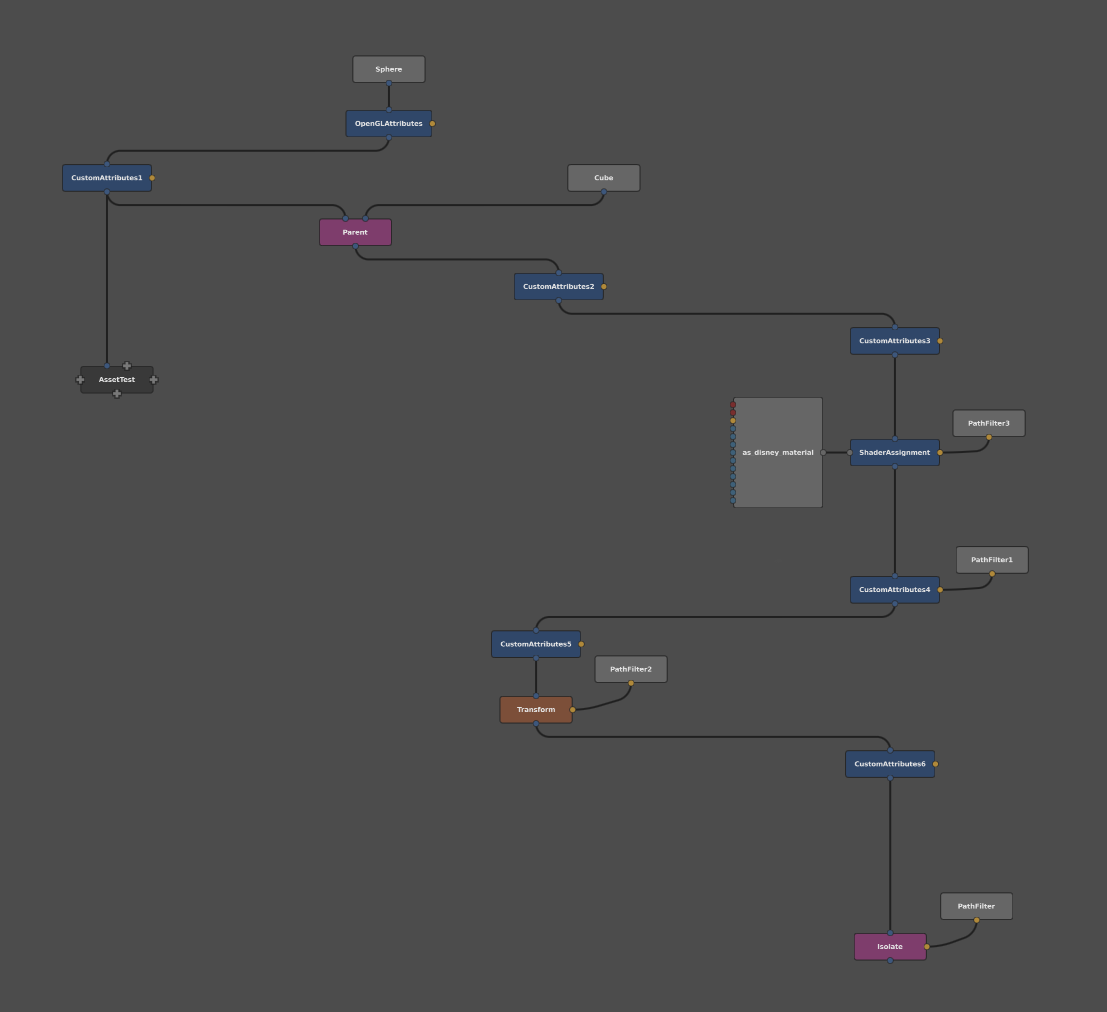
Let's say you inherit a node graph in Gaffer, and you can't make heads or tails of it:
Note: This graph is for demonstration purposes only, and is intentionally artificial and poorly built.

Let's also say that by the end of the graph, the asset has a particular attribute – in this case, an OpenGL shader that puts coloured points along its surface – and you'd like to find out which node in the graph assigned the particular value of this attribute. To accomplish this, you can use Gaffer's Show History feature, which provides a list of each node in the graph that affected a particular scene attribute (or any scene property, in fact). With this powerful feature, you can clarify even convoluted graphs, and determine which nodes are affecting attributes, and then locate them in the Graph Editor.
Viewing Attribute History
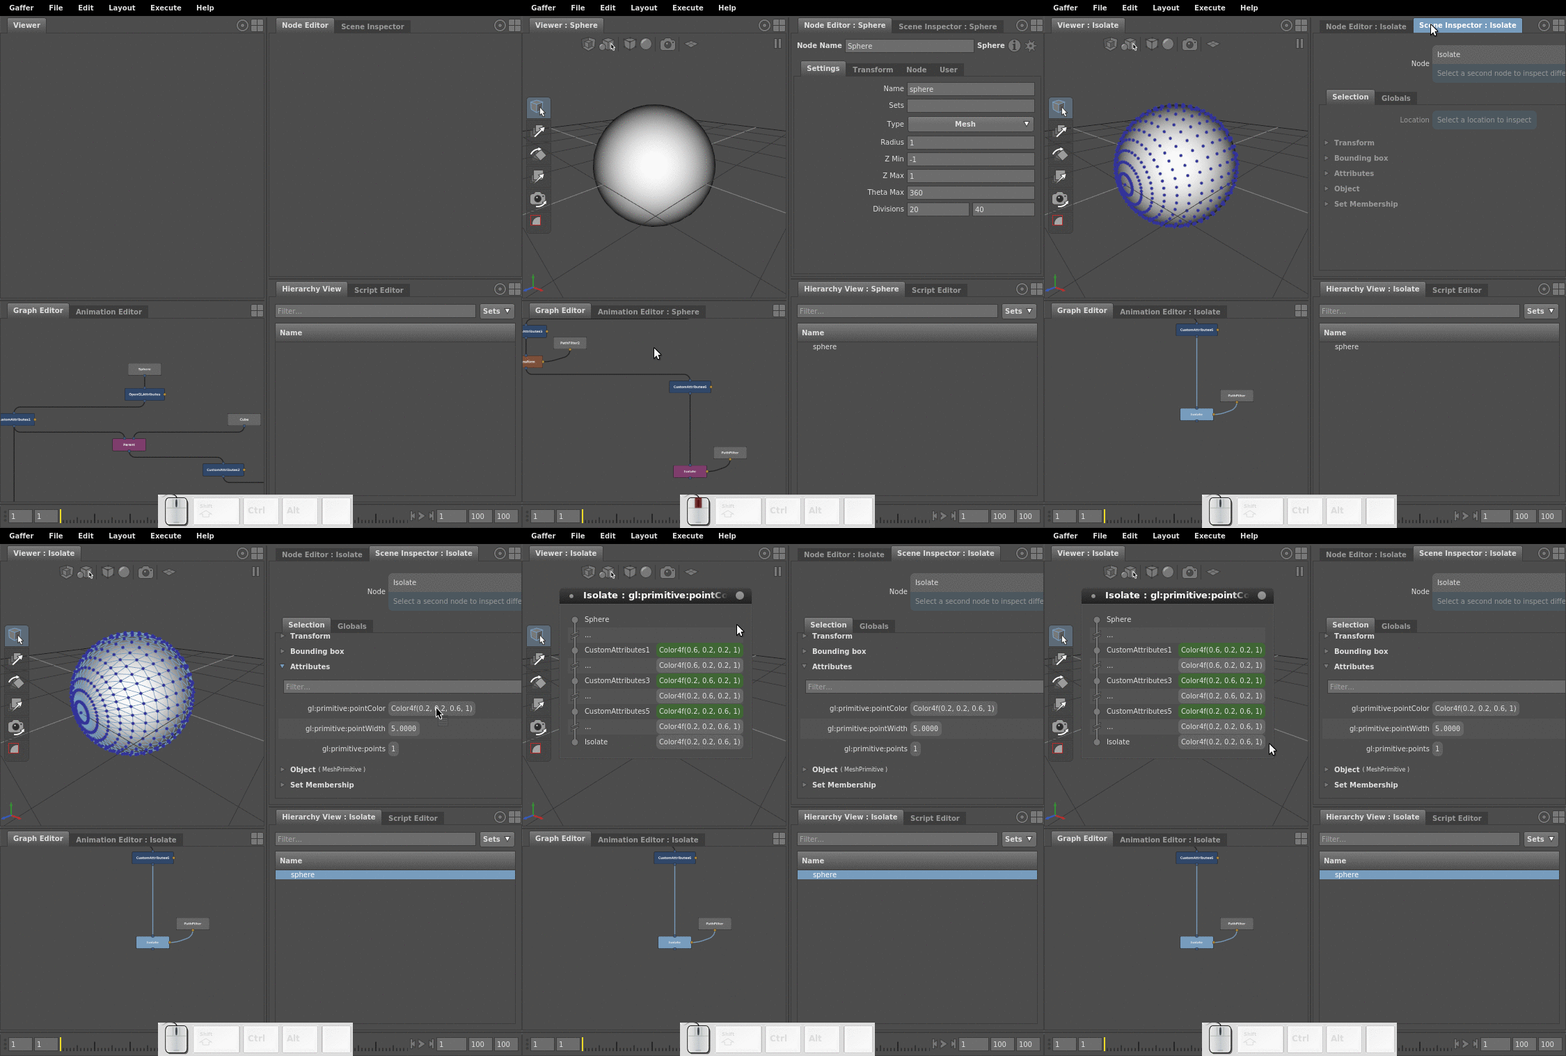
To view the attribute's history:

- Select the node at the part of the graph you wish to investigate.
- Select the target location in the Hierarchy View.
- In the Scene Inspector, under the Selection tab, right-click the attribute's value, and select Show History.
The attribute's history window will open, and show all nodes that affected the attribute. If a node modified the attribute's value, the value will be highlighted in green.
Locating a Node in the Attribute History
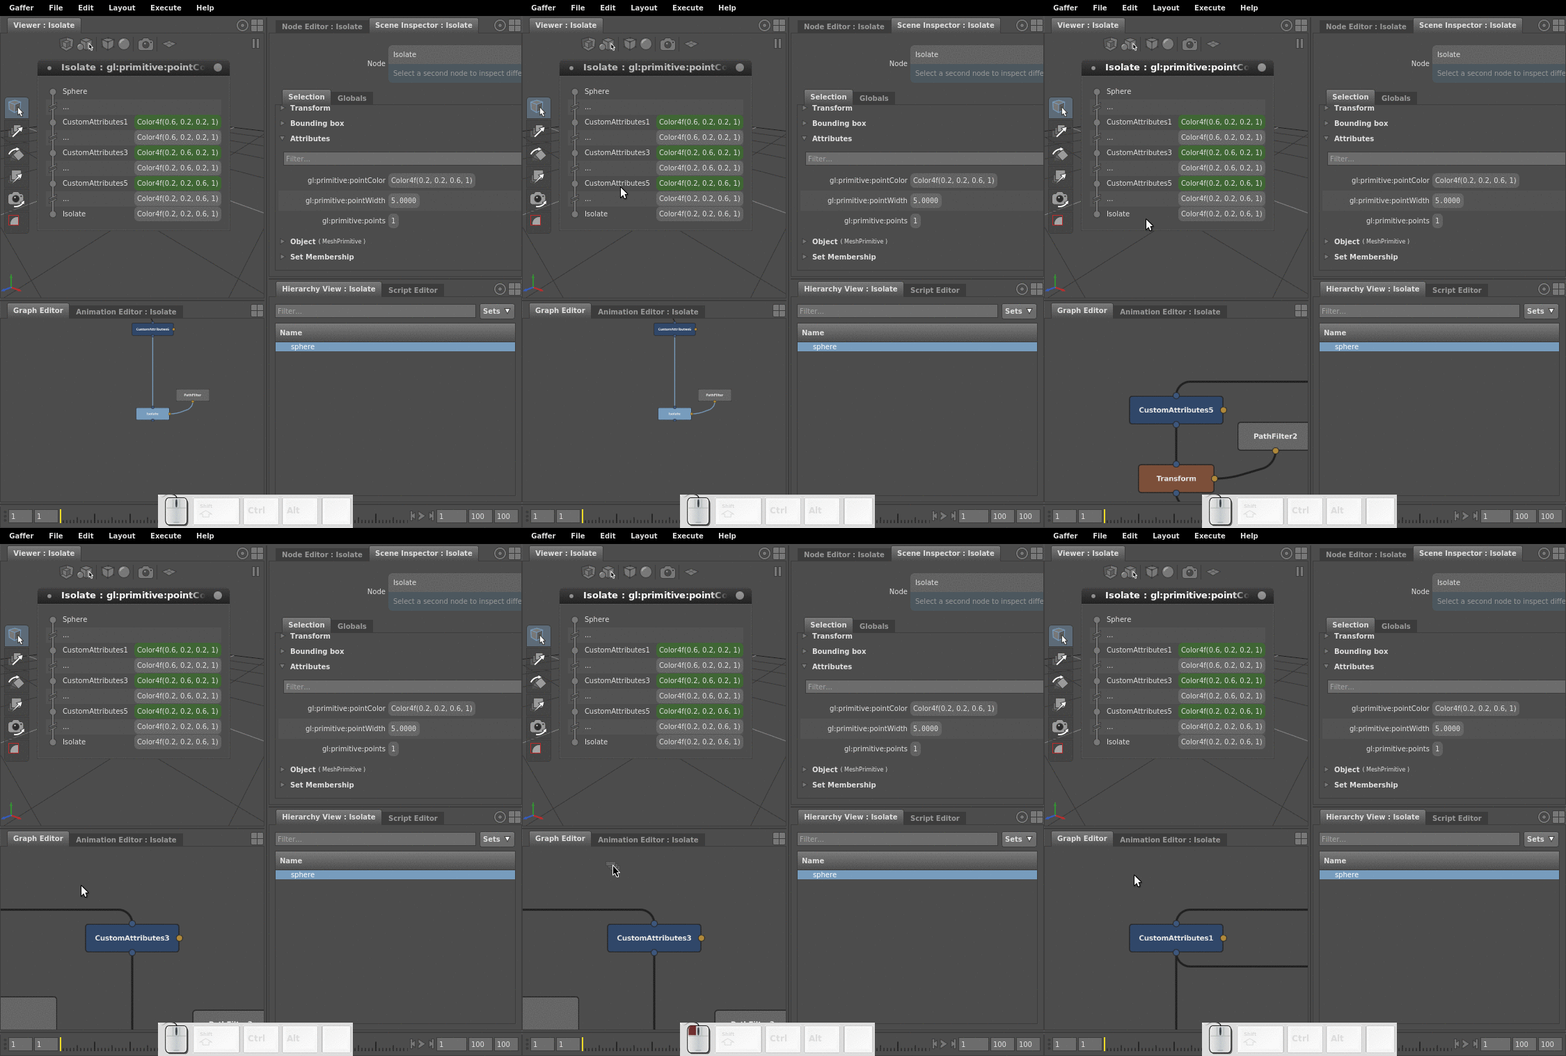
You can also pin-point the location in the Graph Editor of any node in the attribute history.
Note: This feature does not currently focus on nodes inside of Box nodes.

- Click and drag the node name from the attribute history window. The cursor will change to .
- Release over the Graph Editor.
The node will be framed in the Graph Editor, at which point you could select the node and begin adjusting its plug values.
